Vissza az áttekintéshez

MS SQL: Setting up email notifications

Note:

This guide is for skilled computer administrators with experience in working with databases. It is intended to help you set up email notifications. 

However, this guide is in no way a basis for claims in case of data loss. The customer is solely responsible for ensuring a full, correct and recoverable backup of all data.


1. Email notification for an SQL backup

As described in “Setting up an SQL backup for BMD NTCS”, a correctly configured and working SQL backup is required!


In the following example, a local email server is used. Therefore, “localhost” is entered. If you want to use an individual email server (internal or external), you have to guarantee that the SQL Server is allowed to send emails to the desired recipient address via this email server. (Either you allow the SQL Server to use relaying (sending without authentication) or you define a separate user for sending emails.)


1.1. Configure Database Mail

From Windows 10 / Server 2016:

Search for “SQL Server Management Studio” in the Windows Start menu or in the Windows task bar search box.

Alternatively, you can also find the program in Windows Explorer under the following path:
C:\ProgramData\Microsoft\Windows\Start Menu\Programs\Microsoft SQL Server 20xx

Replace “xx” with the SQL version in use.


Older SQL Server versions have a slightly different path and name and can be found under the following path:
C:\ProgramData\Microsoft\Windows\Start Menu\Programs\Microsoft SQL Server 20xx


PLEASE NOTE!

If Windows User Account Control (UAC) is active, you have to start SQL Server Management Studio by right-clicking and selecting “Run as administrator”!

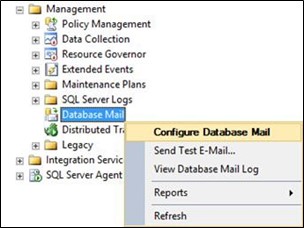
In SQL Management Studio → Management → right-click on “Database Mail” → Configure Database Mail:

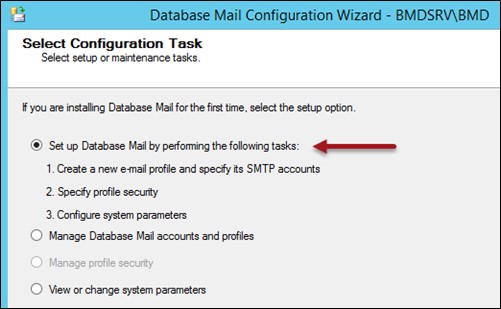
Confirm the start page of the dialogue and choose “Set up Database Mail by …” in the following window:

Confirm with “Yes” in the next window:

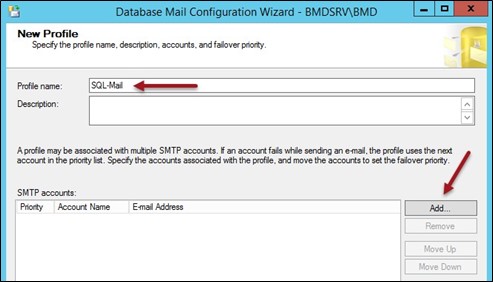
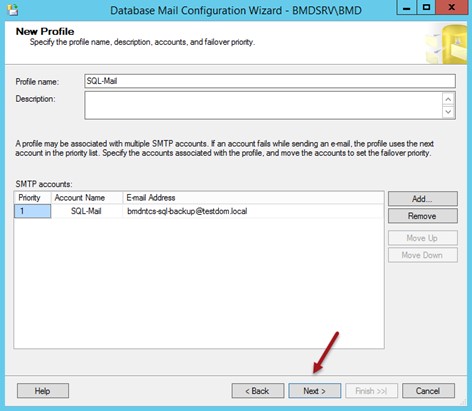
Enter “SQL-Mail” in “Profile name” and click “Add”:

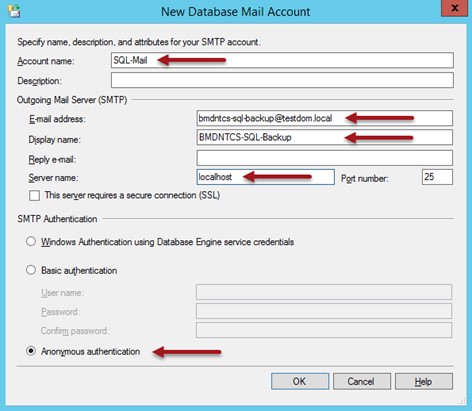
Enter the appropriate values in the following dialogue and confirm with “OK”.


The following values are mandatory:

Account name: SQL-Mail

Email address: sender email address

Server name: IP address or server name of the email server

SMTP Authentication: depending on the email server configuration

Confirm by clicking on “Next”:

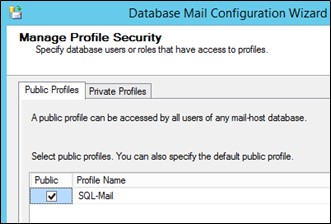
Choose the public profile name here:

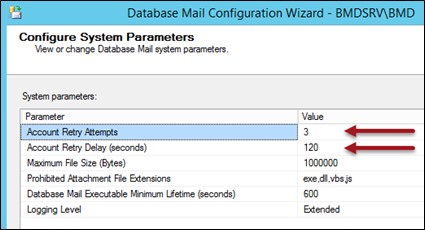
In the system parameters, change the “Account Retry Attempts” value to 3 and, if required, change the value of “Account Retry Delay”:

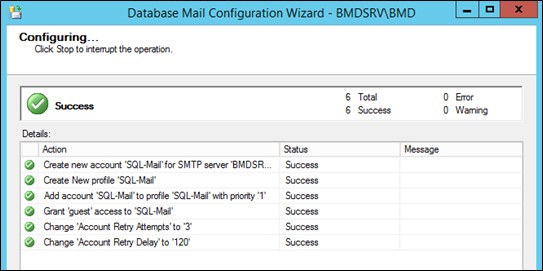
Finish the assistant:

1.2. Test email

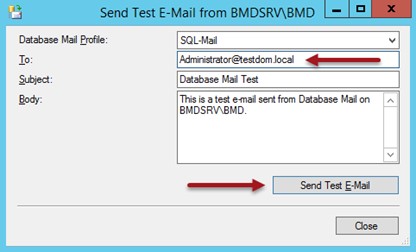
Now, you can already send a test email to the future recipient address:

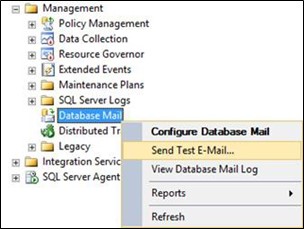
In SQL Management Studio → Management → right-click on “Database Mail” → Send Test E-Mail → enter the future recipient in “To” and check whether the test email was sent and received correctly.
 

1.3. Activate emailing

Now, you have to activate emailing:

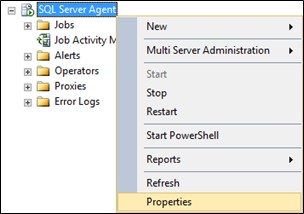
Right-click on SQL Server Agent → Properties → Alert System → Enable mail profile

Mail system: Database Mail

Mail profile: SQL-Mail

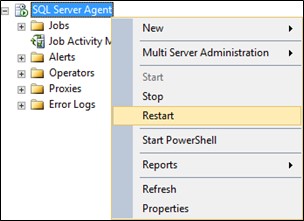
Afterwards, you have to restart the agent. Right-click on SQL Server Agent → Restart:

1.4. Create recipient

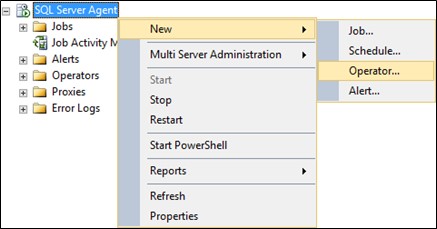
Create the recipient now. Right-click again on SQL Server Agent → New… → Operator.

Enter here the address you have previously tested:

1.5. Store email notification

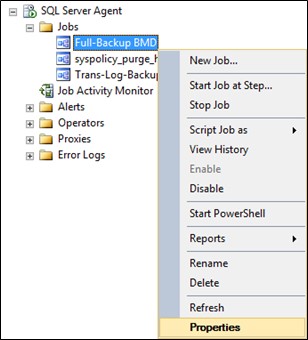
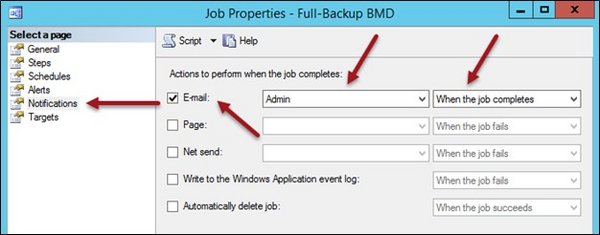
Finally, the email notification has to be stored in the two backup jobs: SQL Server Agent → Jobs → right-click on “Full Backup BMD” → Properties → Notifications → Activate email and choose “When the job completes”:

1.6. Transaction log backup

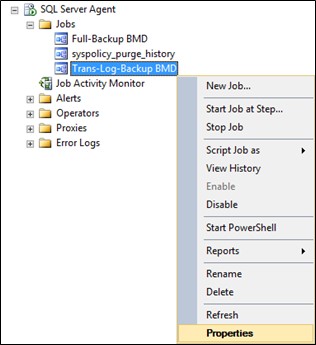
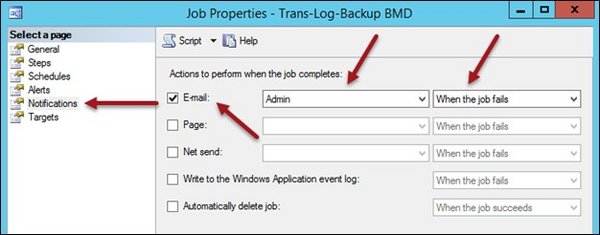
Follow the instructions for the Transaction log backup: SQL Server Agent → Jobs → right-click on “Trans-Log-Backup BMD” → Properties → Notifications → activate “E-mail” and choose “When the job fails”: