Minimum requirements
- Windows Server 2016
- Windows Server 2019
- Windows Server 2022
- Windows Server 2025
- The BMD archive printer runs exclusively on Intel and AMD CPUs. The current ARM Snapdragon CPUs do not support installation of the printer.
Explanation
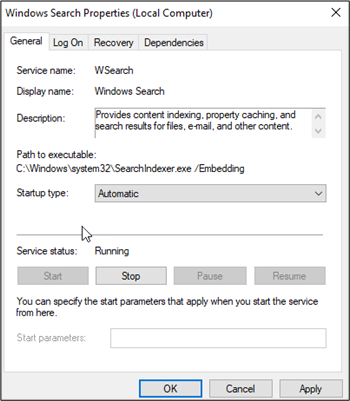
The difference between a regular full-text search and a search via the operating system is that whenever you create or change a document, the indexing catalogue is simultaneously built in the background. The full-text search via the operating system can access this catalogue.
Thus, both types of full-text search have the same result but a full-text search via the operating system is considerably faster.
Please note!
The indexing catalogue is built automatically in the background and only if the server has enough resources. It is therefore possible that documents that have recently been scanned or archived cannot immediately be found in the full-text search. It might take some time.
B) Installing the IFilters
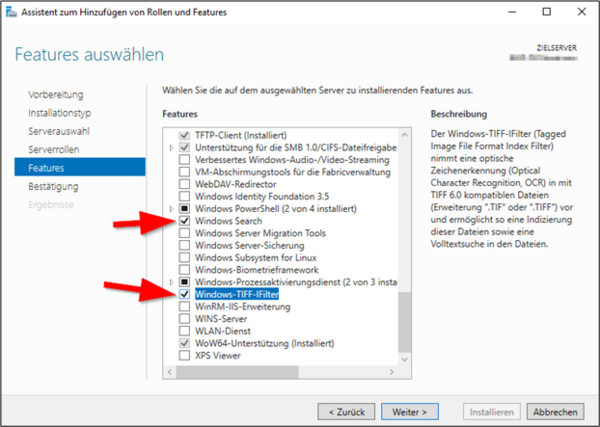
To fully index PDF documents or Office documents, it is required to install so-called IFilters on the server which runs Windows Search.
A free-of-charge IFilter for PDF files is automatically installed with the Adobe Acrobat Reader. For this filter, please install the 64-bit version of the Adobe Reader directly on the server.
https://get.adobe.com/uk/reader/otherversions/
Microsoft offers separate IFilters for Office documents which are based on Office 2010:
Download Microsoft Office 2010 Filter Packs from Official Microsoft Download Center
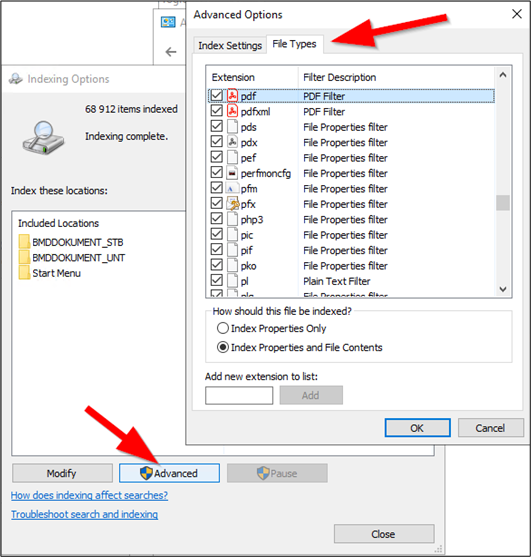
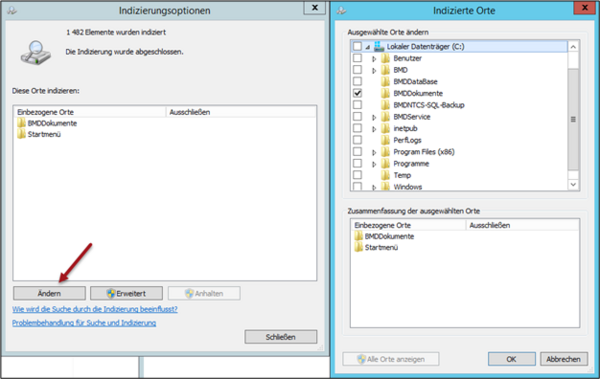
You can check which file types are indexed by which filter in the Control Panel in the “Indexing Options” under “Advanced settings”.
Storage process:
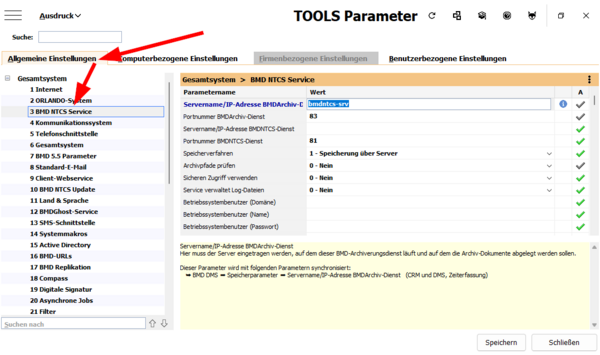
1 – Store via server
Server name/IP address:
IP address or server name where the service is installed.
Port number:
You can choose the port number freely. The default port number is 81.
Please note!
When Windows Firewall is active, the service (BMDNtcsSvc.exe) has to be added to the exceptions (TCP)!
Please note!
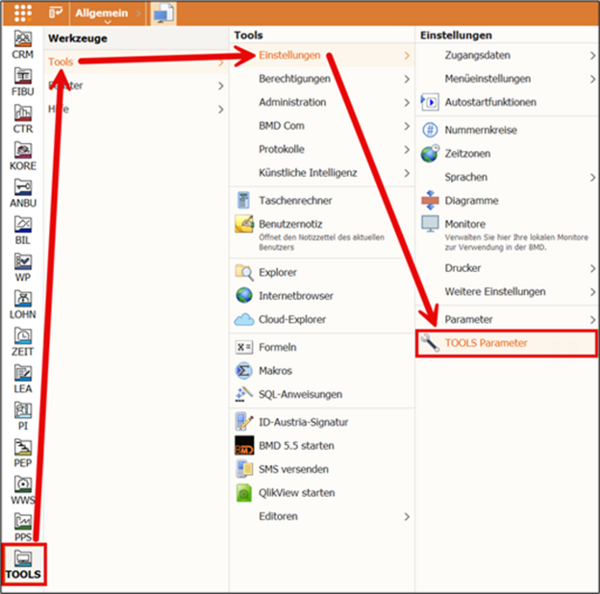
Whenever settings are changed in BMD NTCS, you have to restart BMDNtcsSvc in the services!
F) Special case: archive is on a separate server
In this case, the service BMDNTCSSvc must be installed on a different server and access to it has to be set in the BMD NTCS parameters.
To do this, copy the files BMDNtcsSvc.exe – libeay32.dll – ssleay32.dll – msvcr71.dll from the directory \\BMDSRV\BMDNTCS_PGM (e.g. C:\BMDService).
Create a BMDSERVICE.INI file in the same directory with the following content:
[BMDUPDATESERVICE]
UpdateClient=3
Host=BMDSRV
Port=81
NoUpdateSQL=1
NoUpdateNLS=1
NoUpdateDATA=1
The host refers to the server where the BMD NTCS program is installed. The server then automatically gets newer files from the main server when an update or a patch was installed.
Additionally, create a BMD.INI file in the same directory according to the pattern below:
[BMD]
BIN=\\BMDSRV\BMDNTCS_PGM\BIN
NLS=\\BMDSRV\BMDNTCS_PGM\NLS
DATA=\\BMDSRV\BMDNTCS_PGM\DATEN
LOG=C:\BMDService\LOG
[BMD\ALIASNAMES]
ALIAS0=BMDSRV\BMD:BMD
Now, you can create and start the service using the parameter /INSTALL.
Example: C:\BMDService\BMDNtcsSvc.exe /INSTALL


