Instructions
For the procedure described below, all users must be logged out of BMD NTCS.
1. Initial installation with latest installation medium
First, you have to install BMD NTCS on the new computer/server using an up-to-date data medium for initial installation. Please make sure to follow the installation instructions provided with the installation medium. If possible, it is advisable to use the same paths as on the previous system. Ideally, you do not have to change the computer name, for then it will not be necessary to alter any paths and no clients in the network will need adjustment.
PLEASE NOTE!
An update DVD does not contain the SQL installation files that you need for the initial installation of BMD NTCS. You can request a data medium for initial installation and your licence key from the BMD update department (update@bmd.at).
Depending on the operating system that is in use or compatible, the BMD NTCS setup automatically installs the correct version of SQL Server.
Details can be found in the System requirements in the section “Database/operating system versions supported by BMD NTCS”.
2. Backup of the database on the old system
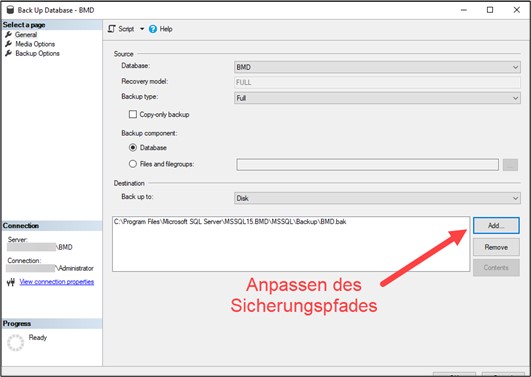
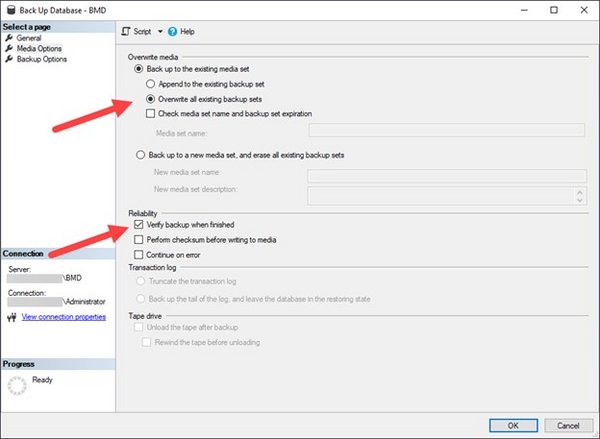
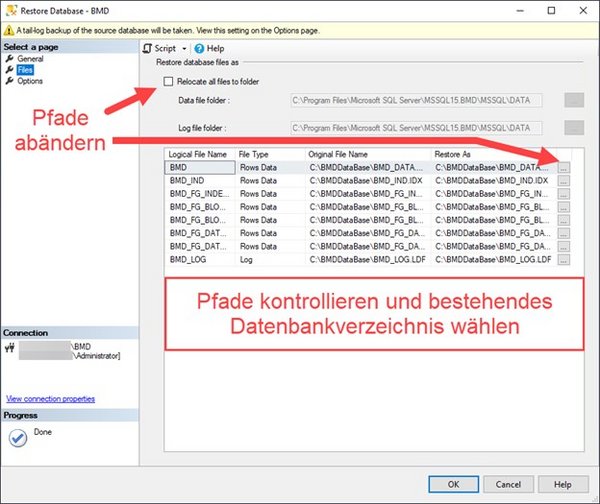
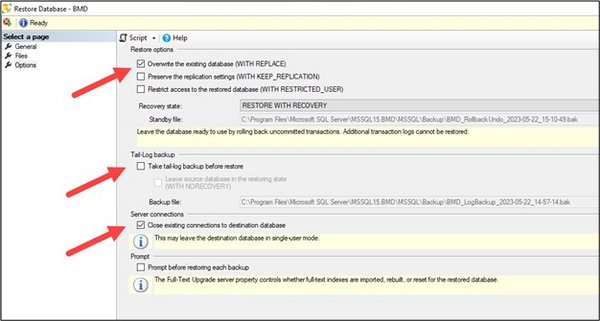
Before moving BMD NTCS, you have to back up the database on the old system. To do this, follow the steps below:
Start the SQL Server Management Studio by right-clicking and selecting “Run as administrator”.
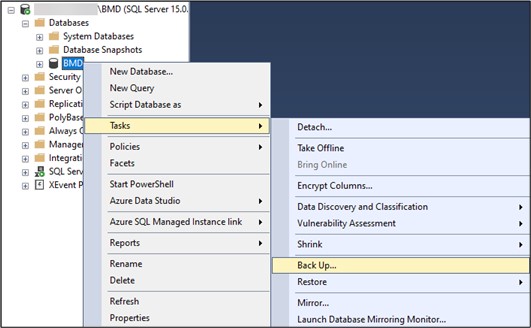
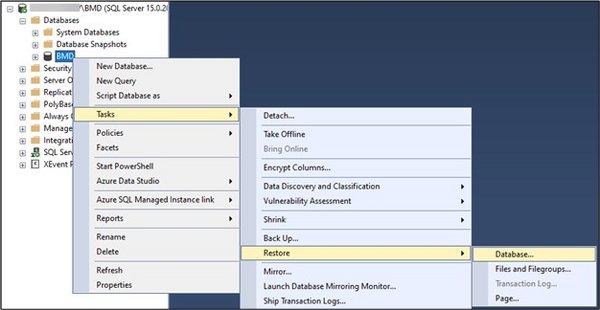
Next, expand the tree to display the item “Databases” and right-click on the database “BMD” → Tasks → Back Up…
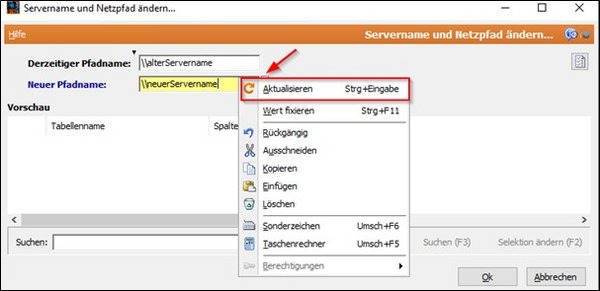
After the login, you can change all entries of the server name as well as the stored UNC paths under
Extras → Miscellaneous service routines → “Change server name and network path”:
Current path name: \\oldServerName → oldServerName and oldServerIPAddress
New path name: \\newServerName → newServerName
After entering the new server name, you can update the paths by clicking on the field with the refresh symbol (arrow) for the entries to be displayed correctly and cleanly.
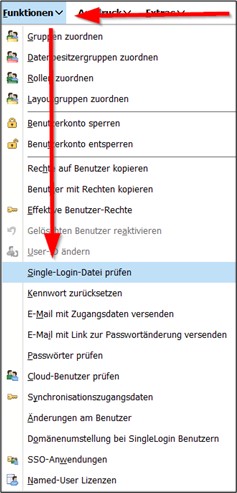
If the Windows domain changes as well in the course of the migration, it can be adjusted using the function “Change domain for single sign-on users”.
Next, please check the following paths:
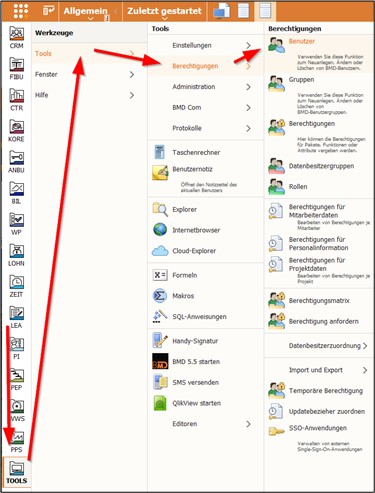
- TOOLS → Tools → Administration → Paths
- TOOLS → Tools → Settings → TOOLS parameters → Overall system → General settings → BMD NTCS service
- TOOLS → Tools → Settings → TOOLS parameters → Overall system → General settings → Communication system
- TOOLS → Tools → Settings → TOOLS parameters → Overall system → General settings → BMD 5.5 parameters
- TOOLS → Tools → Settings → TOOLS parameters → Overall system → General settings → Standard email
- TOOLS → Tools → Settings → TOOLS parameters → Application server → General settings → General + Scheduler
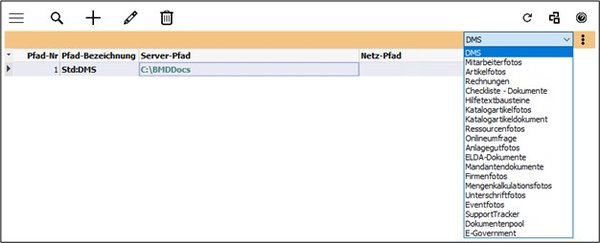
DMS paths: Search → Paths
4. Moving the clients from the old to the new server
Subsequently, you have to move the clients from the old to the new server. The first step is to uninstall the client via the old server. To do so, run \\<oldServer>\BMDNTCS_PGM\BMDNetClient.exe and click on File → “Uninstall BMDNetClient”
Replace “<old-server>” with the actual name of your old server.
PLEASE NOTE!
If Windows User Account Control (UAC) is active, you have to start the BMDNetClient by right-clicking and selecting “Run as administrator”!
PLEASE NOTE!
If you want to enable the option “Local archive add-ons”, you have to close all Microsoft Office programs beforehand!
If the old server does no longer exist, proceed as follows:
- Delete the startup entry:
For 32-bit systems under
HKEY_LOCAL_MACHINE\Software\Microsoft\Windows\CurrentVersion\Run
For 64-bit systems under
HKEY_LOCAL_MACHINE\Software\Wow6432Node\Microsoft\Windows\CurrentVersion\Run - Manually uninstall the BMD client service:
Open an administrative command line window and enter the following command:
sc delete BMDClientSvc - Delete the client directory under %ProgramFiles(x86)%\BMDNTCSClients
- Rename BMDCLIENT.INI in %ProgramData%\BMDNTCS, for example to BMDCLIENT.INI.BAK
Now, you can install the client via the new server. To do so, run
\\<new-server>\BMDNTCS_PGM\BMDNetClient.exe and click on the button “Install”.
Replace “<new-server>” with the actual name of your new server.
PLEASE NOTE!
If Windows User Account Control (UAC) is active, you have to start the BMDNetClient by right-clicking and selecting “Run as administrator”!
PLEASE NOTE!
If you want to enable the option “Local archive add-ons”, you have to close all Microsoft Office programs beforehand!
5. Finishing the migration
After migrating all clients to the new server, please note the following:
- All BMD services have to be deactivated and stopped on the old server.
- The SQL Server service has to be deactivated and stopped (or the database has to be taken offline via SQL Server Management Studio).
- All BMD-specific network shares and the users' access rights have to be removed.
- Alternatively, the network access to the old server should be disabled or the server should be removed from the network completely to prevent any unintended access to the old system!


