1. Connecting with an adapted client and certificate
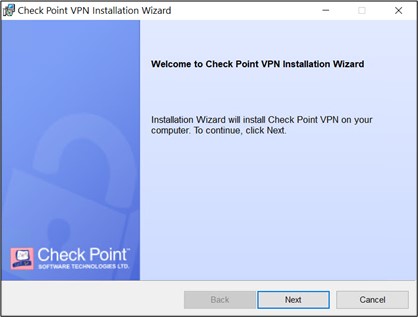
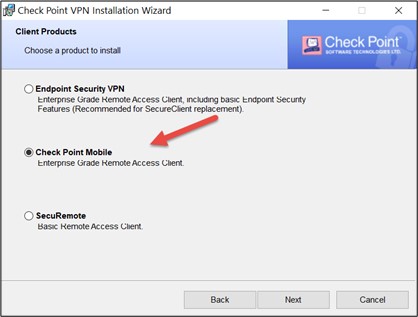
Download the VPN client for the relevant BMD Cloud environment from our FTP server and start the installation.
Confirm the licence prompt and use the suggested installation location.
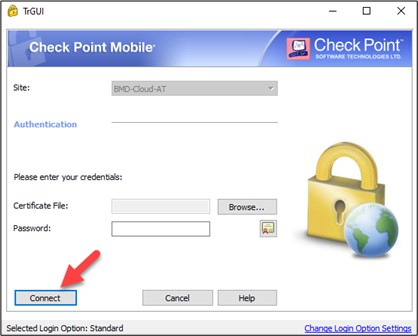
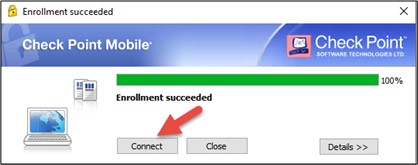
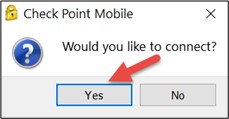
At the end of the installation, a window will appear that allows you to connect to the BMD Cloud system.
Click on the “Connect” button once.
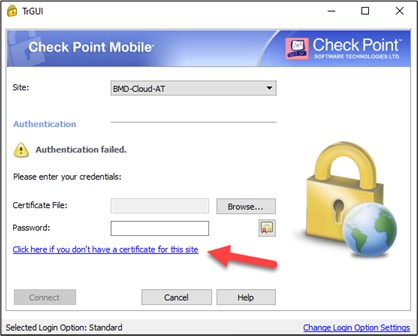
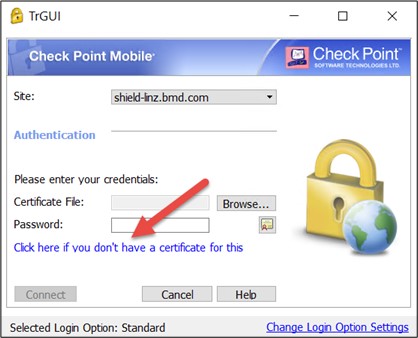
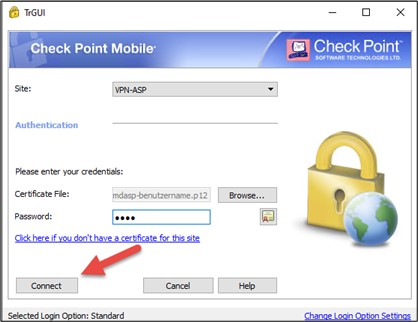
Then, click on “Click here if you don‘t have a certificate for this site”.
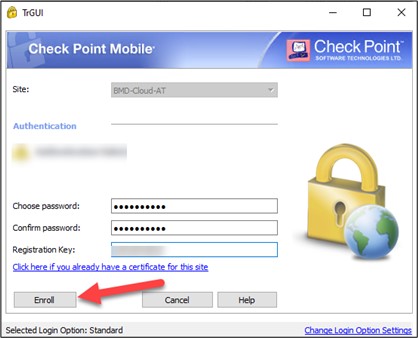
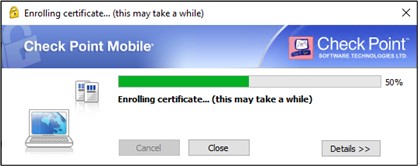
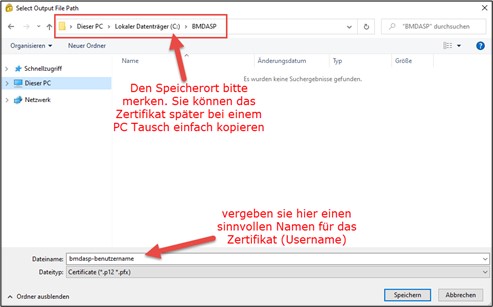
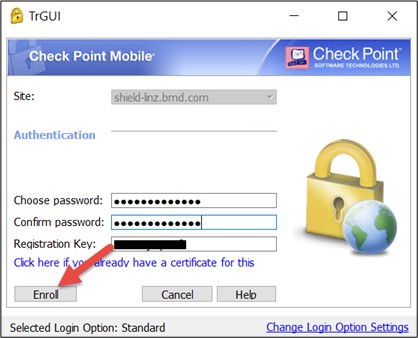
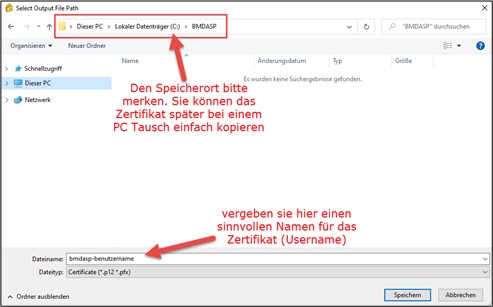
In the future, you will need this password for connecting to the BMD Cloud system. Please make sure to remember it! Click on the button “Enroll”. A certificate will be created, which you will be asked to save on your computer. Please also remember the saving location of the certificate.
Please note! The certificate must be stored on a local drive—not on a network drive! When changing the computer, you can copy the certificate to the new computer.
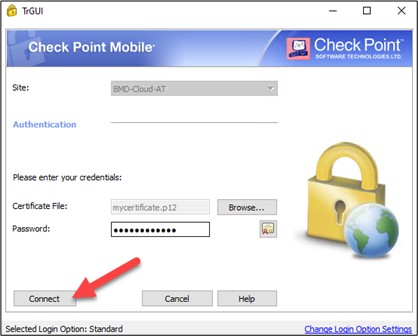
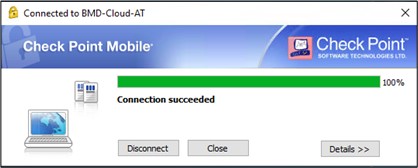
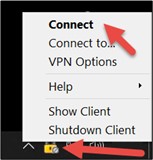
Confirm the next prompts to finish the installation. The VPN client is now ready to use. You will find its yellow lock icon in the notification area of the task bar. If you double-click on the icon, you will be asked to enter the password you just set. As soon as you click on the button “Connect”, a connection will be established. A green circle will appear next to the yellow lock icon, indicating that the connection to the BMD Cloud system has been established successfully.
The next step is the installation of the Parallels Client that is required for connecting to the server. You can also find the installation guide and the required software on our FTP server. Please use the following installation guide: BMD Cloud: Parallels Client
You can see in the notification area that the client has established a connection.

1.1. Establishing a connection using an existing certificate
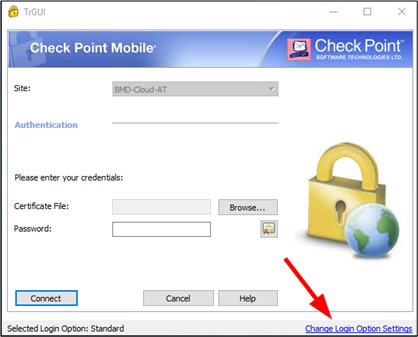
If you are already own a certificate—for instance, because you are only changing your computer—you can use this certificate. Click on “Browse...” to select and use the existing certificate. Please make sure to copy the certificate to your new computer beforehand.
2. Connecting with two-factor authentication (optional additional package)
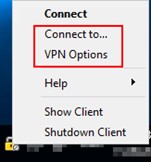
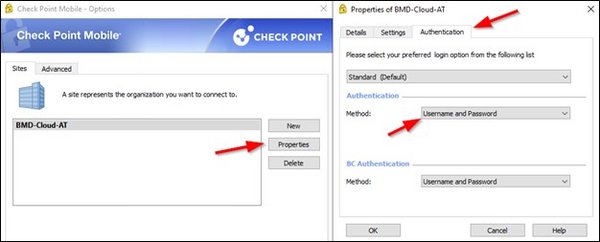
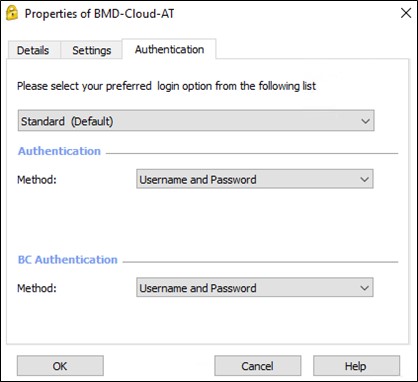
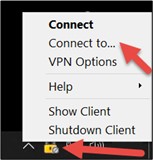
If you want to use the Check Point VPN client with two-factor-authentication, this must be prepared by the BMD IT support team beforehand. Two-factor authentication is an optional package (and subject to charge) that you can use to increase security. In the VPN client, the authentication method must be set to “Username and Password”. To do so, right-click on the VPN client (yellow lock icon) in the task bar and select “VPN Options” or “Connect to...” in the context menu.
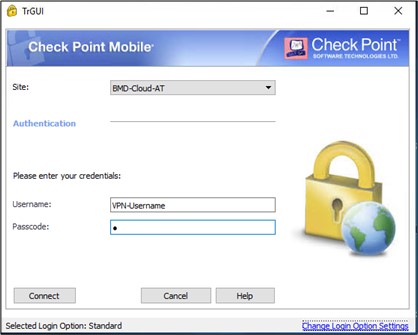
Now, enter your VPN username in the login window of “Check Point Mobile”, which should be the same as the system/Windows username in BMD Cloud. You can enter “p” for PUSH in the field “Passcode” and press ENTER (now, you will have to verify the login on your smartphone with two-factor authentication) or enter the passcode generated by the app “MobilePASS+”.
3. Manual setup – use this only if errors occurred when using the first method!
Download the VPN client for the relevant BMD Cloud environment from our FTP server: https://ftp.bmd.com/BMD-Cloud/CheckPointVPN_manuelle_Einrichtung.msi
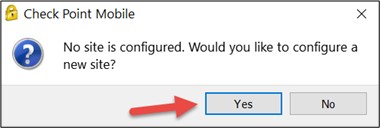
Confirm with “Yes” and click on “Next” in the next window.
Enter the data corresponding to the BMD Cloud environment and press “Next”.
Austria shield-linz.bmd.com | |
Germany vpn.bmdcloud.de | |
Switzerland shield-aspch.bmd.com |
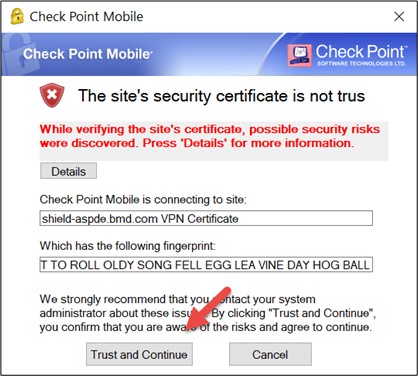
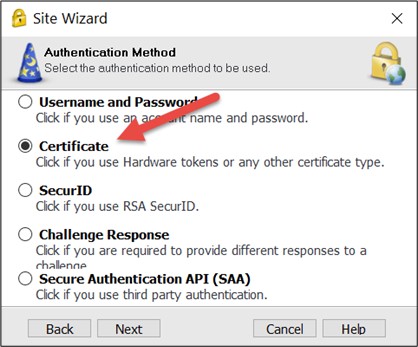
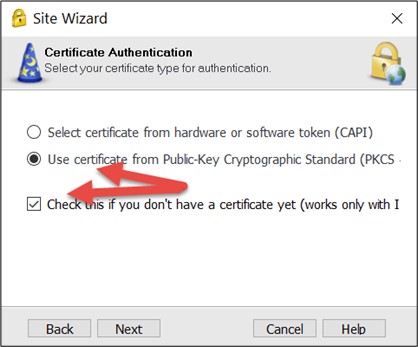
Choose the highlighted settings on the following pages and confirm them by pressing “Next”.
Afterwards, enter the password you defined and click on “Connect”.
Now, you are connected to the BMD Cloud firewall and can install the Parallels Client. Please use the following installation guide: BMD Cloud: Parallels Client
4. Check Point client troubleshooting
4.1. Firewall ports
If you have any issues creating or renewing the certificate, please check the following outgoing ports to shield-steyr.bmd.com and the port of the firewall of your choice (see section 3. Manual setup).
UDP 500 – IKE
TCP 500 – IKE over TCP
TCP 264 – topology download was used by SecureClient
TCP 18264 – ICA certificate registration
UDP 2746 – UPD encapsulation
The password has now been changed.
4.4. Other reasons why you might not be able to establish the VPN connection
- Another VPN connection is already active.
- The certificate is synchronised with a cloud storage (Google Drive, OneDrive, etc.) or located on a network drive.
- The Check Point Mobile client is too old: simply carry out the latest setup. This will update the client.


